

In this article, we will learn about how to set the spring boot active profile in AWS Elastic Beanstalk
Here are the steps on how you can set Spring Boot Active Profile in AWS Elastic Beanstalk Console
1. Log in to the AWS Management Console:
Log in to your AWS account and navigate to the AWS Elastic Beanstalk service.
2. Select Your Environment:
In the Elastic Beanstalk dashboard, select the application environment where you want to configure the Spring Boot active profile.
3. Go to Configuration:
In the left navigation pane, click on your environment name to access the configuration settings.
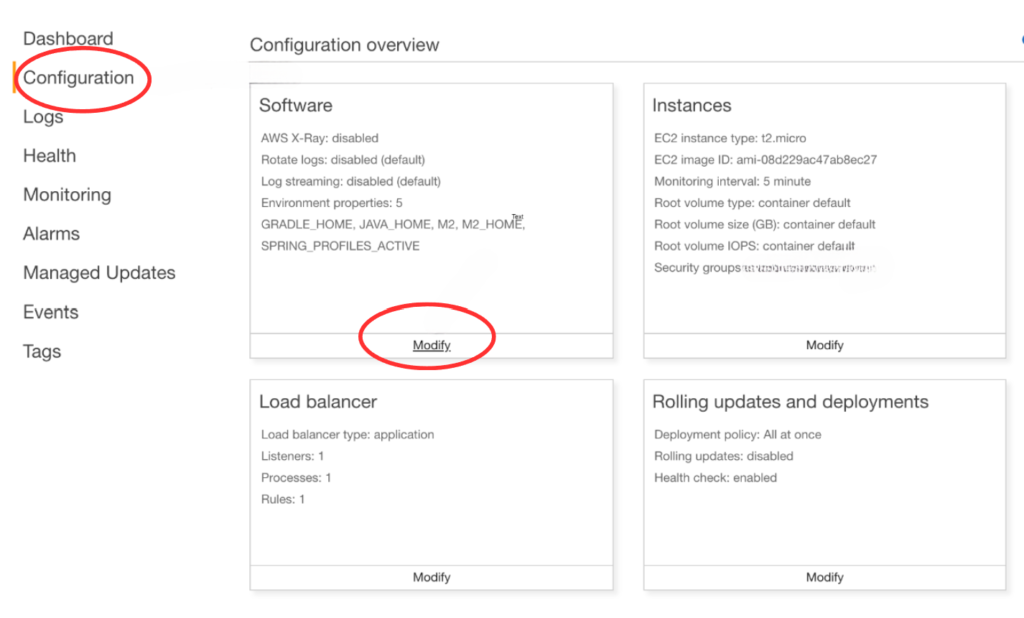
4. Set Environment Properties:
In the Configuration section, scroll down to the “Software” configuration. Look for the “Environment properties” section and click on the “Edit” button.

5. Add the Spring Boot Active Profile:
To set the Spring Boot active profile, add a new environment property:
- Click on the “Add another property” button.
- Set the “Name” to
SPRING_PROFILES_ACTIVE. - Set the “Value” to the profile you want to use (e.g.,
dev,qa,prod).

6. Save Changes:
After adding the environment property, click the “Apply” button to save the changes to your environment configuration.
7. Deploy Changes:
Elastic Beanstalk will automatically redeploy your application to apply the new environment configuration. Monitor the deployment process in the Elastic Beanstalk console.
8. Verify:
Once the environment restarts, your Spring Boot application should use the specified active profile based on the environment variable you set. In this way, you can easily set Spring Boot Active Profile in AWS Elastic Beanstalk.
For more reference, you can follow the AWS documentation
To access more articles on Spring Boot and AWS, we welcome you to explore our easy2excel.in website.